Installing and Maintaining Solar Panels on Your Motorhome in Australia
Setting up and maintaining solar panels on a caravan involves four straightforward stages: securely mounting panels to your roof with waterproof sealing, connecting wiring from panels through a charge controller to batteries, testing everything before travel, and following a simple maintenance routine of monthly cleaning plus quarterly connection checks. Most DIY enthusiasts complete basic 160W installations in 4 to 6 hours using standard tools, while ongoing upkeep requires just 15 minutes monthly.
And the surprising part? Maintenance is actually easier than most people think. The work happens upfront during installation, then everything runs smoothly with minimal attention.
Everything you need to know:
- Step-by-step installation process from roof preparation to final testing
- How to wire panels, controllers, and batteries without making costly mistakes
- Simple weekly, monthly, and yearly maintenance tasks that prevent problems
- Five common solar motorhome issues and how to fix them yourself
- When DIY makes sense versus hiring mobile RV electricians
- Performance tips that maximize power generation for years
- A realistic maintenance schedule you can actually stick to
What Installation Really Involves
The complete installation process for solar panels on caravans breaks into three main phases. Each phase needs different skills and careful attention to detail.
Planning and Preparation
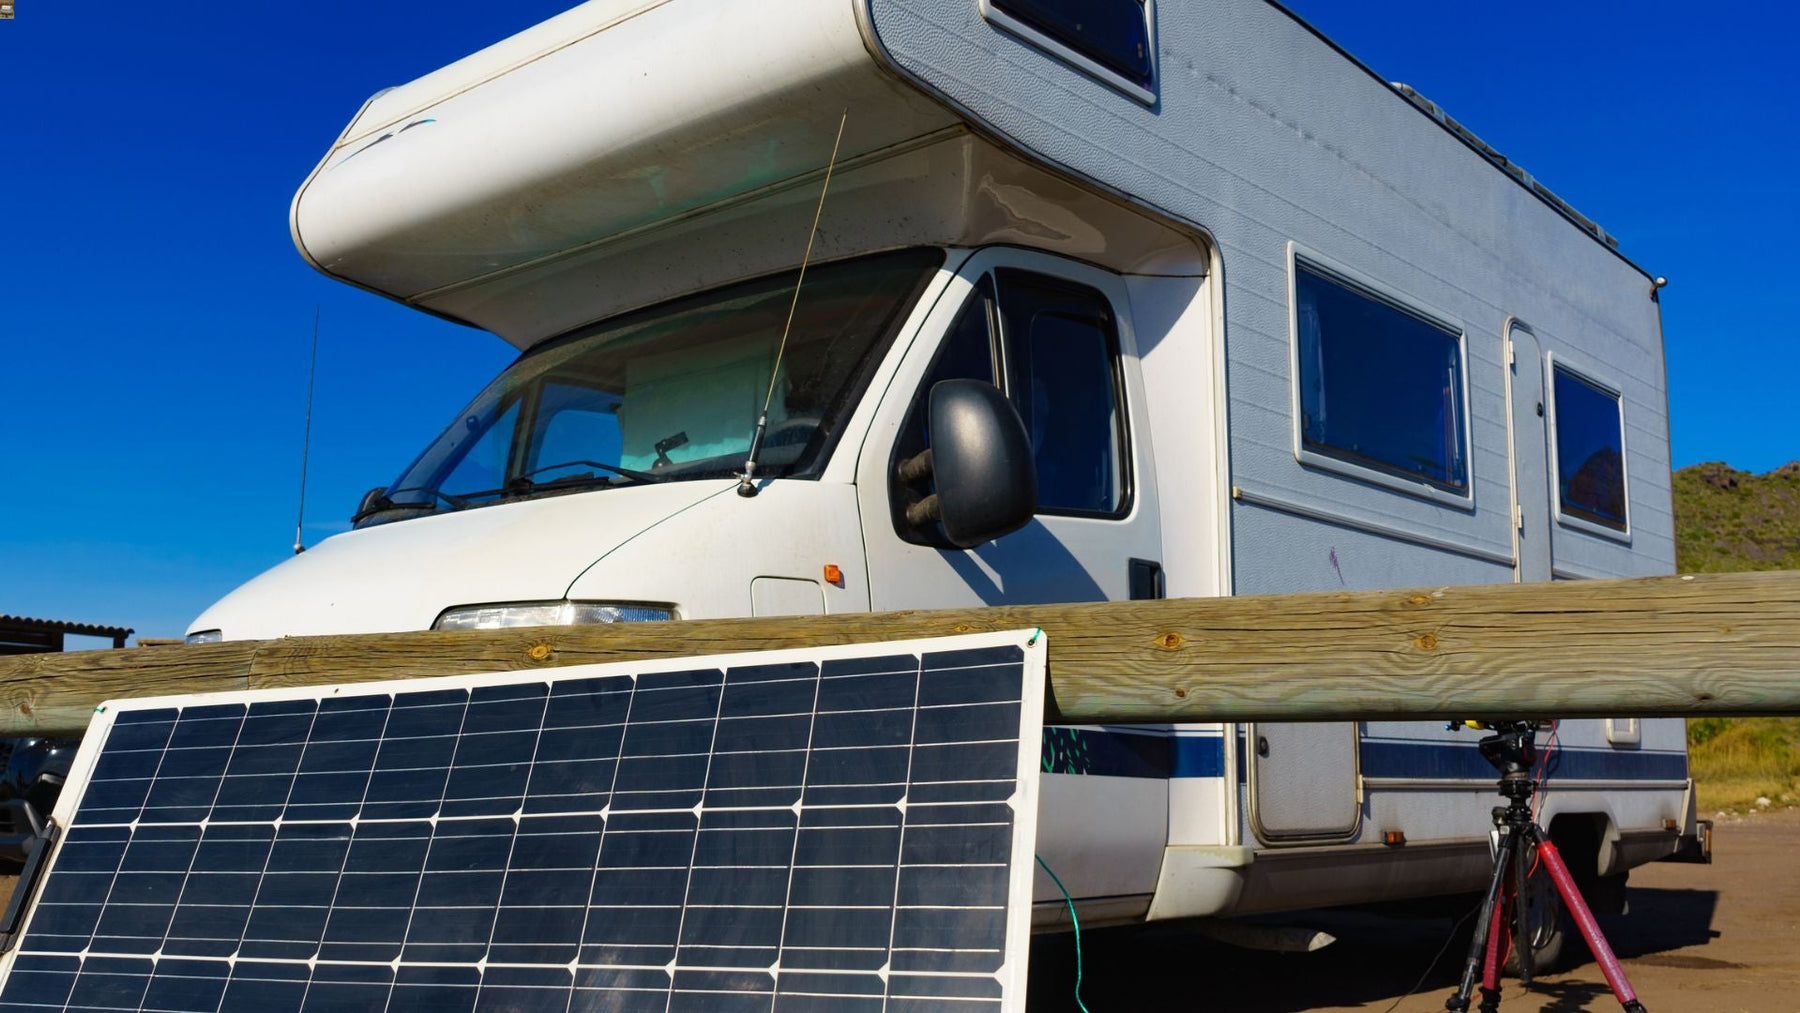
Before touching any tools, spend time mapping out your installation. Measure available roof space between vents, air conditioners, and hatches. A standard 160W panel measures roughly 1480mm by 670mm. You need a clear mounting area plus extra space around the edges for brackets.
Use masking tape to mark potential panel locations. Walk around your caravan at different times of day, checking for shadows cast by roof accessories. Panels need maximum sun exposure, particularly between 10 am and 3 pm when generation peaks.
Identify your roof construction type. Fibreglass, aluminium, and composite materials each require different drilling approaches. Locate roof rafters running perpendicular to caravan length, spaced 400mm to 600mm apart, providing secure mounting points.
Mounting and Waterproofing
Quality installations start with proper mounting brackets. Systems like the Aussie Traveller 160W Solar Panel Kit include brackets designed specifically for caravan applications, sized to handle panel weight and highway wind loads.
Drill pilot holes at marked locations, keeping holes slightly smaller than mounting screws. Clean around each hole with methylated spirits, removing dust and oils that prevent sealant from bonding properly.
Marine-grade polyurethane or butyl sealant creates waterproof barriers around penetrations. Apply sealant generously before inserting screws. Excess sealant squeezes out when you tighten screws, confirming complete coverage.
Attach brackets first, then secure panels to brackets using provided hardware. Apply additional sealant over screw heads and bracket edges after assembly is completed.
Electrical Connections
Route cables inside your caravan whenever possible. Drill a roof entry hole near your battery location to minimize internal cable runs. Use cable glands or grommets at roof penetrations to keep water out.
Mount your charge controller inside on a wall near batteries. Controllers need ventilation and should stay accessible for monitoring.
Connect panels to controller inputs first, watching polarity markings carefully. Red wires go to positive terminals. Black wires connect to negative terminals. Reversed polarity destroys controllers instantly.
Connect the controllers to the batteries next. Install circuit breakers or fuses between controllers and batteries. A 160W panel at 12V produces roughly 10 amps maximum, so 15 amp fuses provide suitable protection.
Testing Your New System
Check panel output voltage at controller input terminals with panels in bright sunlight. Standard 12V panels should produce 18V to 22V open circuit. Verify controller output voltage at battery terminals shows 14.2V to 14.8V during charging.
Monitor battery voltage over several hours in full sun. Voltage should climb steadily as charging progresses. Test under load by running typical appliances while monitoring voltage.
Take a test camping trip close to home before venturing far. This reveals installation issues while you're near tools and repair resources.
Difficulty of Keeping Systems Running
Maintaining a motorhome solar system running properly demands less effort than newcomers expect. Quality installations using decent components need minimal intervention beyond basic cleaning and occasional checks.
Difficulty depends more on installation quality than on ongoing maintenance complexity. Poor installations with inadequate sealing or wrong settings create recurring headaches. Good installations simply work year after year.
Most caravan owners invest 15 to 20 minutes monthly on solar upkeep. This covers visual inspections, cleaning, and basic testing. Yearly maintenance adds another hour for detailed inspections.
Required Ongoing Maintenance
Caravan solar panels need surprisingly little ongoing maintenance. The short list includes regular cleaning, connection inspections, performance monitoring, and occasional component checks.
Cleaning Panels Regularly
Dust, dirt, bird droppings, and tree sap block sunlight and reduce power generation. A dust-covered panel might produce 30% to 40% less power than when clean.
Clean panels monthly during regular use, or after dusty travel. Plain water and a soft brush or microfibre cloth work perfectly. Avoid abrasive scrubbers that scratch tempered glass.
Early morning or late evening cleaning works best. Hot panels in direct sun cause water to evaporate quickly, leaving mineral spots. For stubborn bird droppings, mix water with small amounts of car wash soap. Rinse thoroughly after washing.
Checking Electrical Connections
Vibration from travelling gradually loosens electrical connections. Temperature cycling causes wire terminals to expand and contract, working screws loose over months.
Inspect all visible connections every three months. Check cable entry points remain sealed and waterproof. Look for corrosion around terminals, appearing as white, green, or blue powder.
Tighten loose terminal screws promptly. Clean corroded connections with fine sandpaper or a wire brush. Examine cable insulation for damage from road debris or animal chewing.
Monitoring Performance
Check battery voltage and controller displays regularly during trips. Modern controllers show daily generation, charging status, and system faults on screen displays.
Keep simple records of daily power generation during good weather. This creates baseline performance data. Sudden drops in generation signal problems needing investigation.
Most 160W systems generate 40 to 50 amp hours daily in good Australian conditions. Seeing only 20 to 30 amp hours on clear sunny days means panels need cleaning or connections have issues.
Five Common Problems and Solutions
Five issues account for roughly 80% of solar system failures in caravans.
Problem One: No Charging is Happening. Start at the controller. Check for error codes or warning lights. Verify battery voltage isn't below 10.5V. Check panel connections at controller terminals. Measure panel voltage directly using a multimeter. Check inline fuses.
Problem Two: Reduced Power Output. Clean dirty panels thoroughly. Eliminate partial shading by repositioning. Inspect connections for corrosion. Verify controller settings match battery chemistry.
Problem Three: Batteries Not Fully Charging. Verify controller charge voltage matches battery specifications. Calculate daily consumption versus generation. Check battery age and condition. Replace aging batteries failing capacity tests.
Problem Four: Water Leaks at Mounts. Inspect the mounting bracket sealant yearly. Remove old sealant completely and reapply fresh marine-grade sealant. Check cable entry glands. Preventive resealing every 2 to 3 years costs under $50.
Problem Five: Controller Failures. Controllers fail less often but eventually wear out after 5 to 10 years. Test by disconnecting controllers and measuring the panel voltage directly. Replace with the same or higher capacity units.
Maximizing Long-Term Performance
Getting the best performance from caravan solar setups long term focuses on keeping panels clean and unshaded, maintaining tight connections, and protecting components from extremes.
Position caravans so panels face north in Australia when parking for extended stays. This maximizes sun throughout the day. Avoid large trees when possible. Find open spots receiving full sun from mid-morning through mid-afternoon.
High temperatures reduce efficiency. Panels produce maximum power at 25 degrees Celsius. Brackets elevating panels slightly above roofs allow air circulation underneath, keeping panels cooler.
Secure mounting prevents lifting during highway travel. Check mounting bolt tightness every few months. Inspect frame edges for damage from hail or debris. Protect junction boxes from moisture using silica gel packs replaced yearly.
Practical Maintenance Schedule
A realistic maintenance schedule balances thoroughness with actual time available.
Weekly Quick Checks: Check controller displays show normal charging. Verify battery voltage increases during sunny hours. Look for visible damage to panels or cables. Takes 3 to 5 minutes.
Monthly Detailed Maintenance: Clean panel surfaces thoroughly. Inspect cable routing for damage. Check the sealant around brackets. Tighten visible electrical connections. Record daily generation numbers. Takes 15 to 20 minutes.
Quarterly Inspections: Check all electrical connections, including junction box internals. Inspect cable insulation along entire runs. Clean terminal corrosion if found. Verify bracket bolts remain tight. Takes 30 to 45 minutes.
Yearly Comprehensive Work: Remove panels to inspect roof surfaces under brackets. Clean and reseal around mounting points with fresh sealant. Replace damaged cables. Test batteries under load. Takes 2 to 3 hours.
DIY or Professional Help
Handling solar panel installation and upkeep yourself versus hiring professionals depends on your comfort with basic electrical work, tool access, and confidence working safely on caravan roofs.
Installing solar successfully requires distinct skills. You need carpentry skills for drilling and mounting. Electrical knowledge helps with wiring. Waterproofing skills prevent damaging leaks.
If you've successfully installed caravan accessories like awnings or roof vents, you probably have the needed skills. Basic electrical understanding matters. Distinguish positive from negative wires, understand voltage concepts, and follow wiring diagrams accurately.
Hire mobile RV electricians when installations involve complex multi-panel arrays, integration with systems you don't fully understand, curved roofs, or insurance requirements. Professional installation costs $200 to $500 for basic 160W systems.
Ongoing maintenance falls within DIY capabilities for nearly everyone. Cleaning panels, inspecting connections, and monitoring performance need no special training. Buy basic tools: a soft brush, microfibre cloths, a screwdriver set, a wire brush, and a simple multimeter. This $50 to $80 investment lasts for years.
Frequently Asked Questions
How often should I clean solar panels on my motorhome in Australia? Clean panels monthly during active use or after travelling through dusty regions. Outback travellers may need cleaning every 2 to 3 weeks, depending on dust exposure. Clean more frequently if you notice output drops compared to your baseline.
Can I walk on solar panels mounted on my caravan roof? Avoid walking on panels whenever possible. Tempered glass withstands hail, but footwear concentrates pressure differently. Walk on the roof areas around panels instead. If you must step on panels briefly, distribute weight across the entire foot.
What causes solar panels to stop working suddenly? Sudden failures usually trace to blown fuses, disconnected cables, or controller malfunctions rather than panel damage. Check fuses first, then verify all cable connections stay tight. Controllers occasionally need power cycling.
Do I need to disconnect solar panels when storing my caravan? Leave panels connected during storage. Controllers prevent overcharging while maintaining full charge levels automatically. Disconnected batteries self-discharge over months. Solar maintains batteries perfectly during storage.
How long do charge controllers last in motorhomes? Quality PWM controllers last 7 to 10 years on average. MPPT controllers typically survive 5 to 8 years, depending on heat exposure and power cycling frequency. Controllers in climate-controlled interior spaces last longer.
What voltage should my solar system show when charging? During bulk charging in full sun, you should see 14.2V to 14.8V at the battery terminals, depending on battery chemistry. Float charging voltage drops to 13.4V to 13.8V after batteries reach full charge.
Can I upgrade my solar system by adding more panels later? Adding panels works if your controller has spare capacity. A 10A PWM controller maxes out around 140W to 160W total. Adding panels beyond controller capacity requires controller upgrades first.
Conclusion
Installing and maintaining solar panels on your motorhome opens up incredible travel possibilities across Australia. The installation requires careful planning and proper technique, but falls within the reach of most DIY enthusiasts willing to work methodically. Ongoing maintenance demands far less time than expected, rewarding simple, consistent care with decades of reliable power.
Long-term success comes from quality initial installation, regular cleaning schedules, and proactive inspections catching small issues before they become expensive problems. Systems installed correctly and maintained properly simply work trip after trip, year after year.
At Shopica, we understand that investing in solar motorhome systems represents a commitment to adventure and freedom. Our family-owned business carefully selects products, balancing quality with practical value, supporting your journey with reliable equipment and knowledgeable customer service. We're here to help you succeed through every ownership stage.
Whether planning your first solar installation or maintaining existing systems, the guidance here gives you practical knowledge for confident decisions. Proper installation combined with simple maintenance routines keeps your solar motorhome running perfectly, powering countless memories across this incredible country.
Disclaimer: All information in this guide is based on research, industry practices, and practical experience with solar installations. Product specifications, installation requirements, and maintenance recommendations may vary based on specific equipment and conditions. Always verify information with equipment manufacturers and follow safety protocols. For specific technical questions, please reach out to us for personalized guidance.